Wet Forming No-Cal Outlines
by Paul Bradley
The Flying Aces Club (FAC) has a fun event called No-Cal scale.
These are profile models with a maximum wing span of 16 inches that must look
like one of the many full size man carrying airplanes that have been built since
the Wright brothers flew their first airplane. The term No-Cal comes a reference
to the profile fuselage having "no calories". While flown both indoors and
outdoors, the event is especially popular with people who fly indoors. The goal
is to have the longest flight time among people entered in the No-Cal event. A
very important factor in long flight time for rubber powered models is their
weight. In consideration of that factor, No-Cal designs use a minimum of
structure. Unnecessary wood, for example, just means you are carrying dead
weight. That will reduce the maximum time aloft for the model. A situation
people want to avoid.
One method to keep the weight of a No-Cal model structure to a
minimum is to form the outlines of the major components from molded balsa
strips. Such an approach really helps get rid of wood in the structure that is
not really necessary. A variety of methods are used by modelers to get balsa
strip wood to bend to the shapes of the model subject component outlines. This
short pictorial article is the method I have been using for many years to create
molded balsa wood strip No-Cal outlines. I have found it to be fast, easy to
perform, and satisfying in terms of the results. Want to give it a try? ... I hope so.
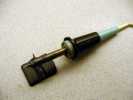
What do you need? Not a lot. The core tool is a 25 watt
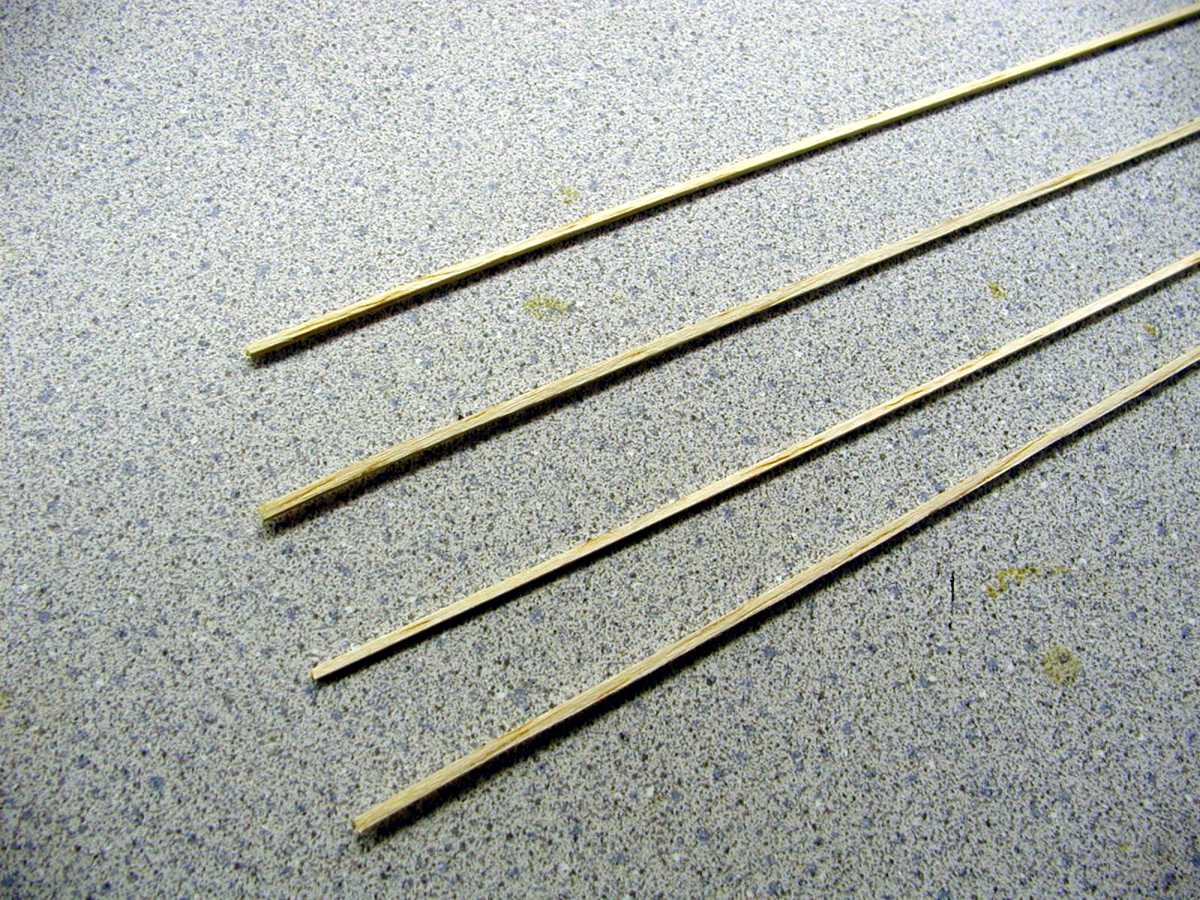
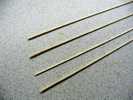
pencil type solder iron. Of course, you will also need some balsa strip wood.
Most No-Cal models, including the ones found in the downloadable plans section
of this web site, use 1/16" square balsa strip. That's it so lets get started.
The process. The photos that follow will take you through
the steps.
 |
 |
 |
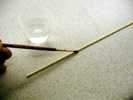
| Everything starts with a simple low wattage pencil style
soldering iron. I use a 25 watt unit. Mine is shown in the picture and
is well used. Plug in the iron and let it heat up while we get the wood
ready. |
The balsa strip to be used should be a reasonably light
grade. Something in the 6 to 8 pound per cubic foot density range. Wood
with higher densities will be harder to form, and will also be heavier
than necessary for the model. We want the model to be as light a
practical. |
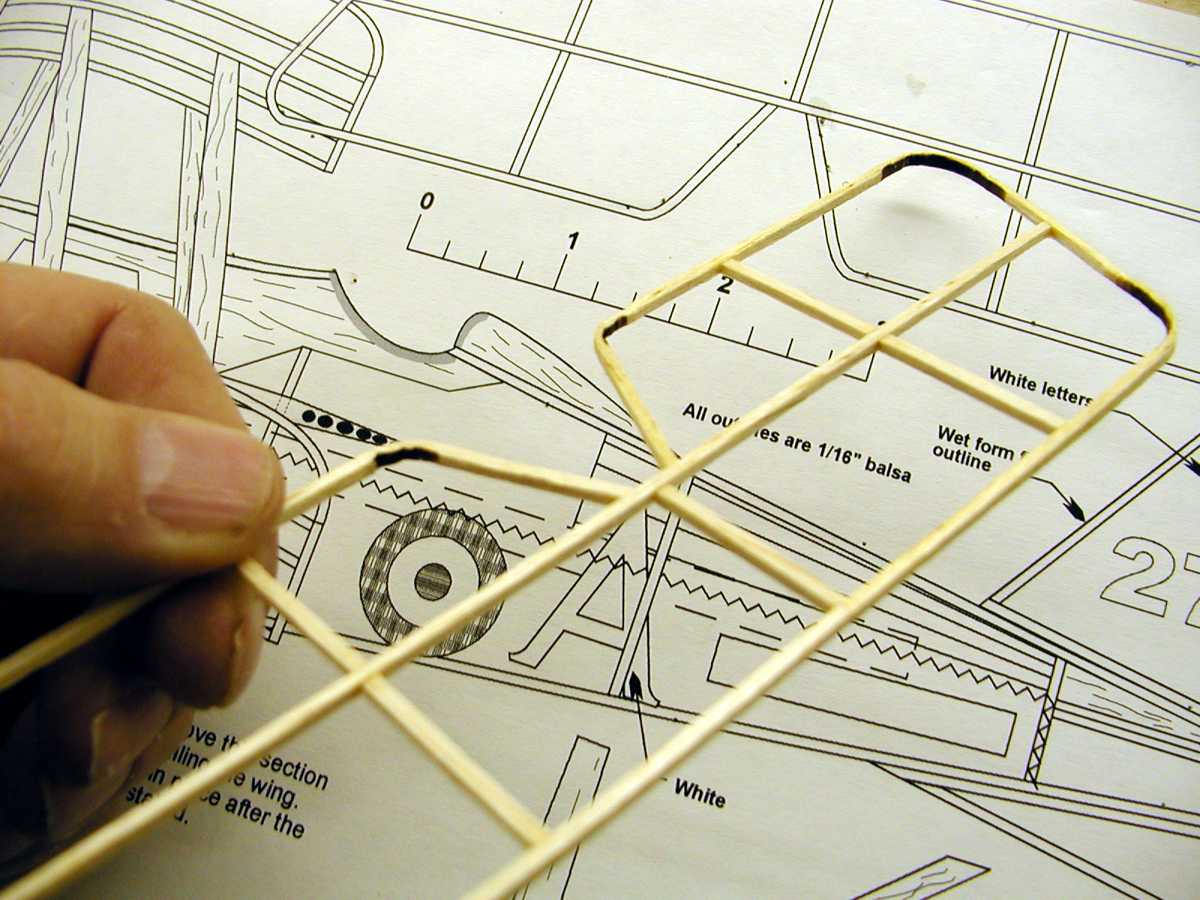
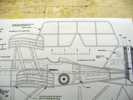
Work near the plan you will be using to build the model.
For this tutorial, I have selected the SE-5a No-Cal from the
downloadable plans section of the web site. The stabilizer has a number
of tight bends. That will be good for demonstrating the process. |
 |
 |
 |
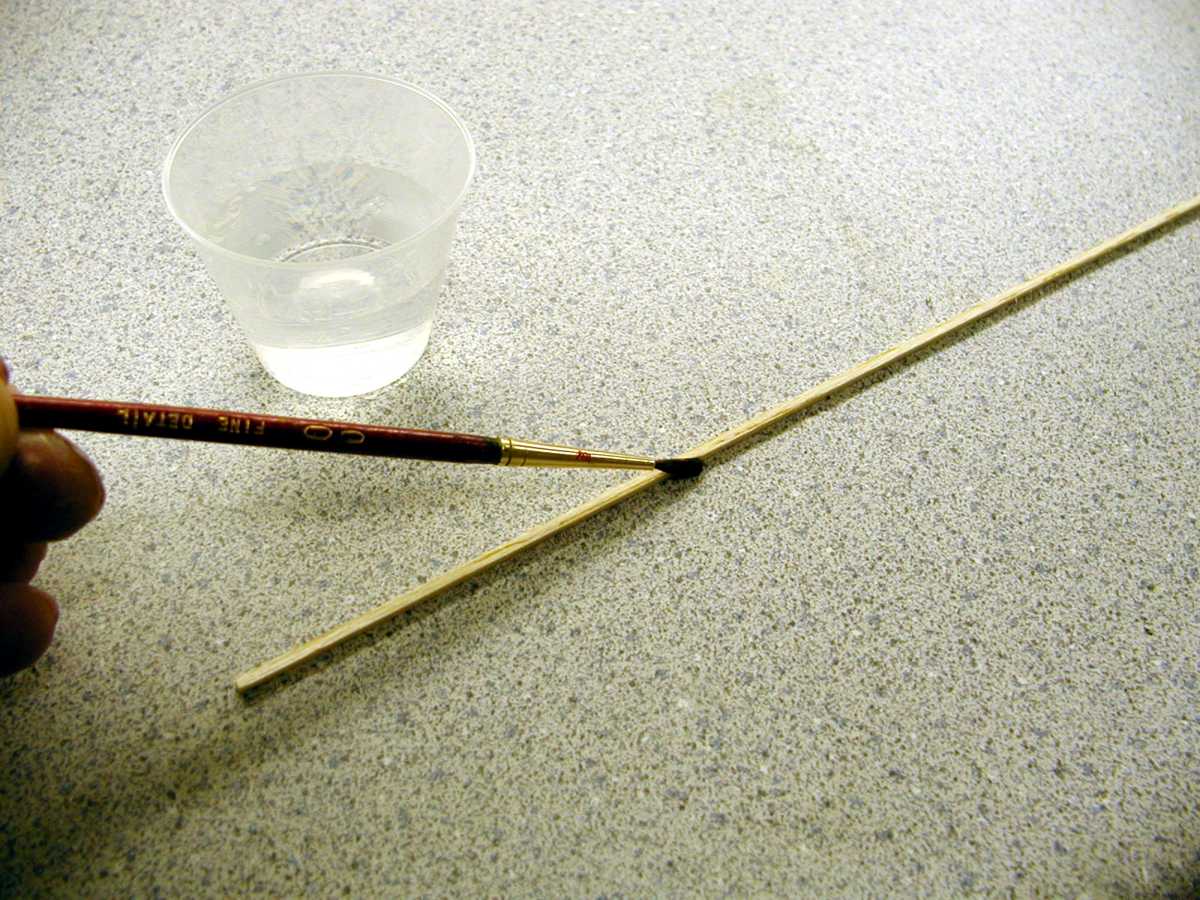
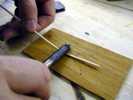
| Begin by wetting the balsa strip in the area to be formed.
You can do that with a paint brush and some water. I actually just place
the wood in my mouth and wet it with salvia. Let the water soak in for a
minute or so. |
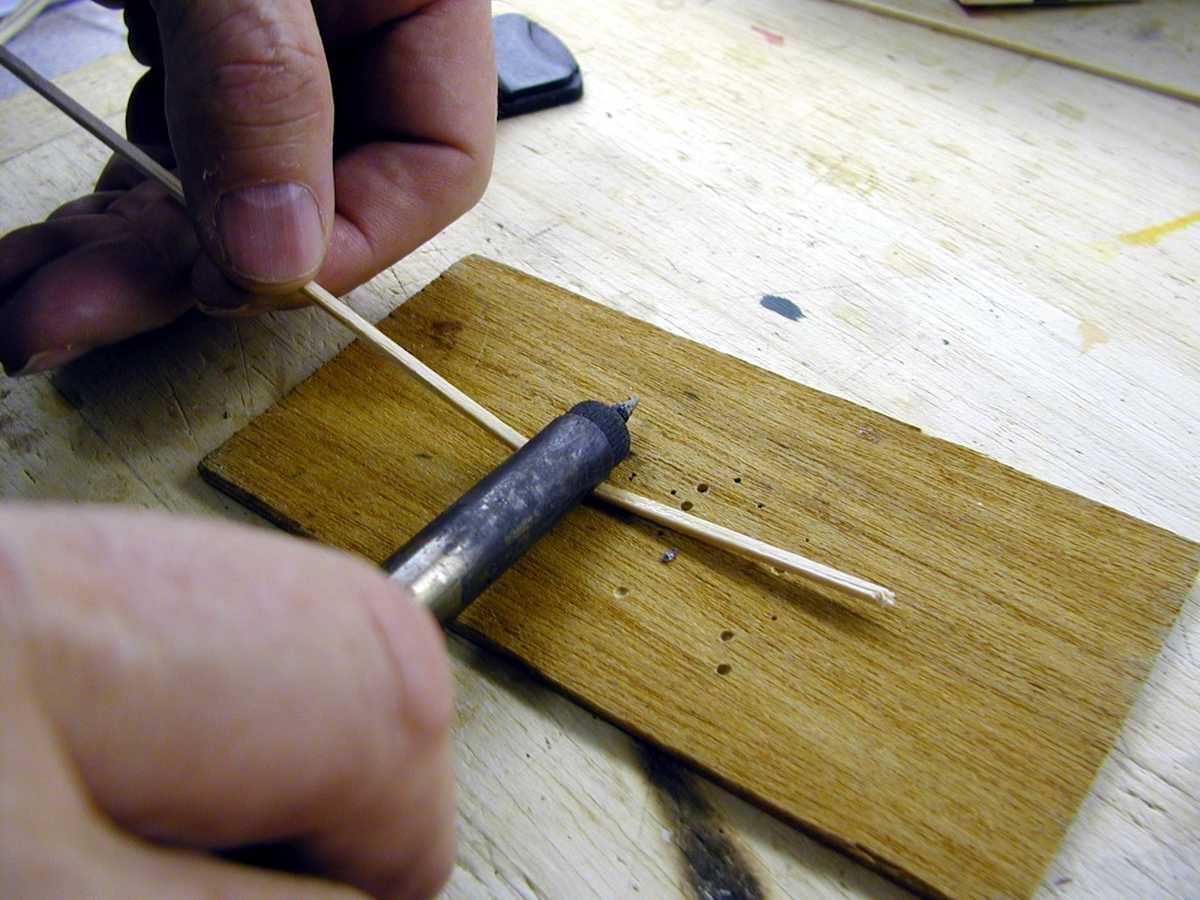
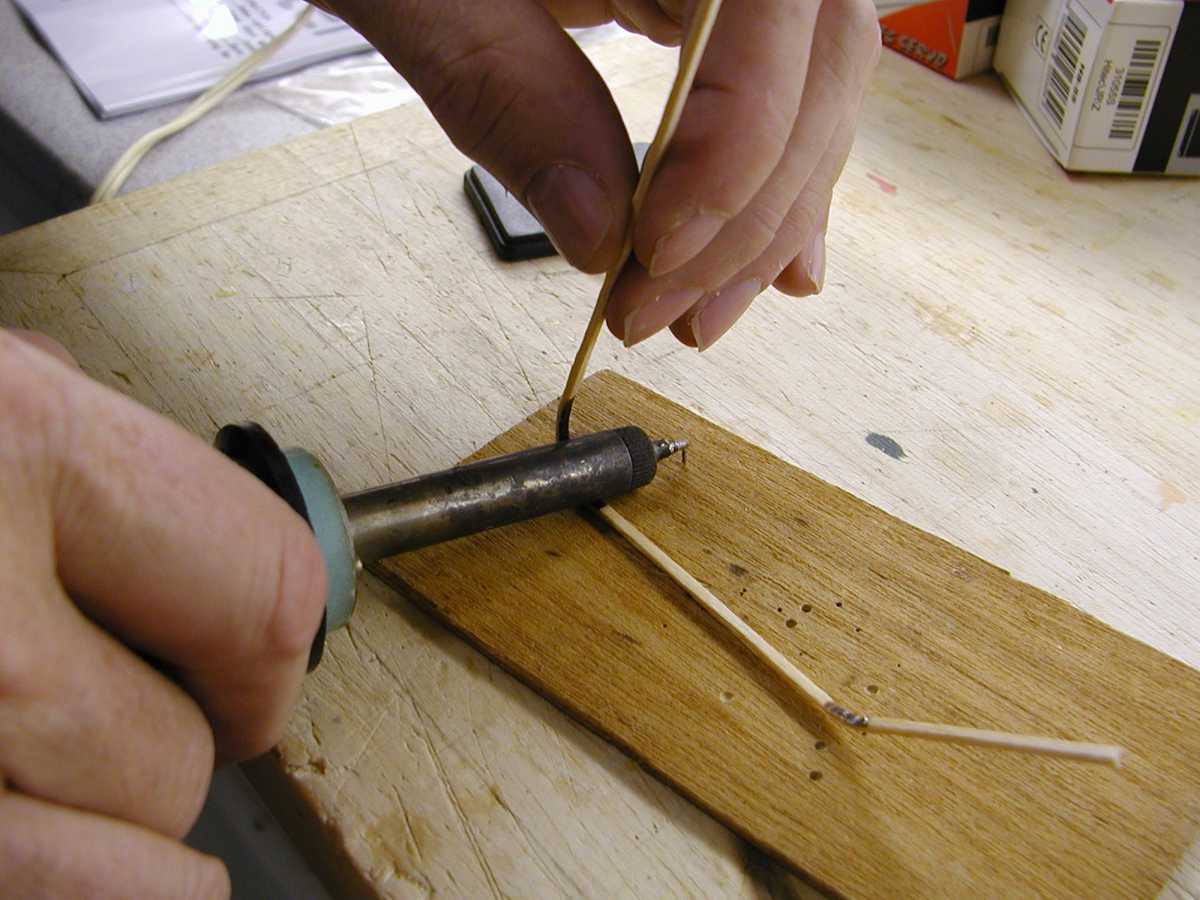
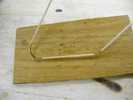
After wetting the wood, place it on a suitable surface
that you don't mind marking up a bit. I use a small piece of plywood.
With the wet balsa strip laying on the work surface, place the barrel of
the soldering iron lightly on the wood where the bend will begin. |
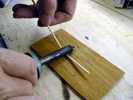
Pull up on the free side of the wood strip. Do this gently
and a little at a time. The heat of the soldering iron will turn the
water to steam. This will make the wood very pliable. Pull up and bend
in small steps. Re-wet the wood often to make sure there is plenty of
water to create steam. |
 |
 |
 |
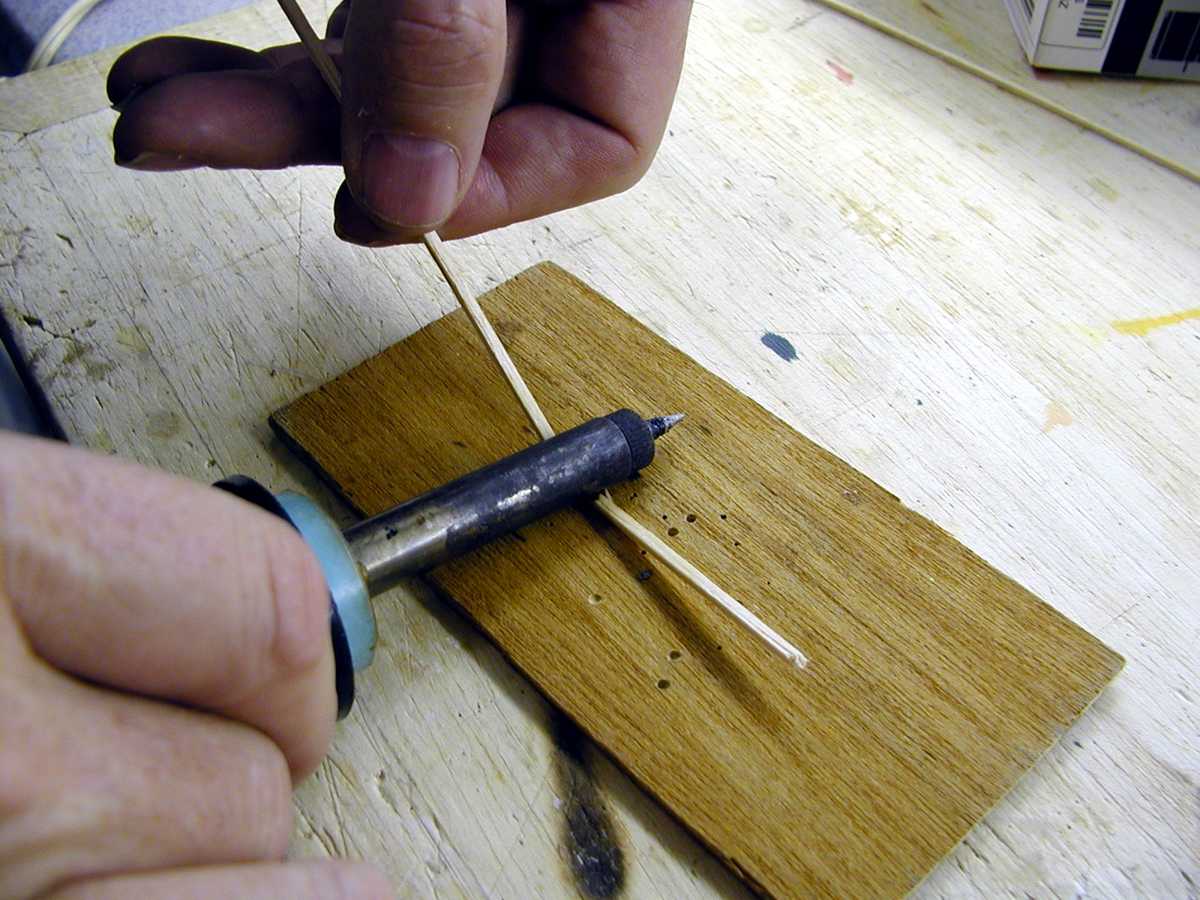
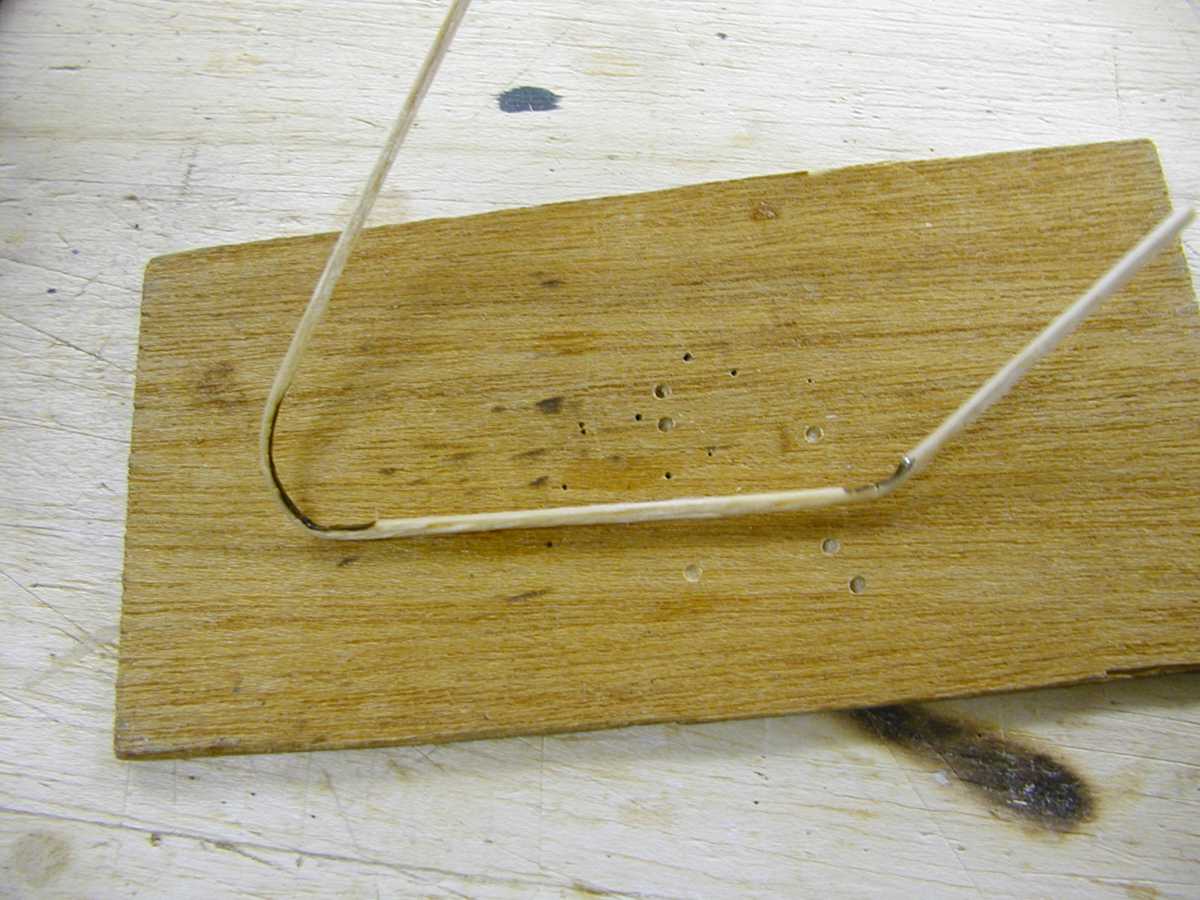
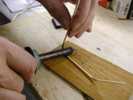
| Keep working the piece to get it to conform to the
approximate shape of the outline. You do not have to be exact at this
point of the process. Some scorching of the wood will occur. That can be
sanded off later if it bothers you. You can also use the tip of the iron
for small radius bends. |
Work your way around the outline forming each bend to the
rough shape of the object. As you gain experience with the process, you
can form many bends in one piece of wood. |
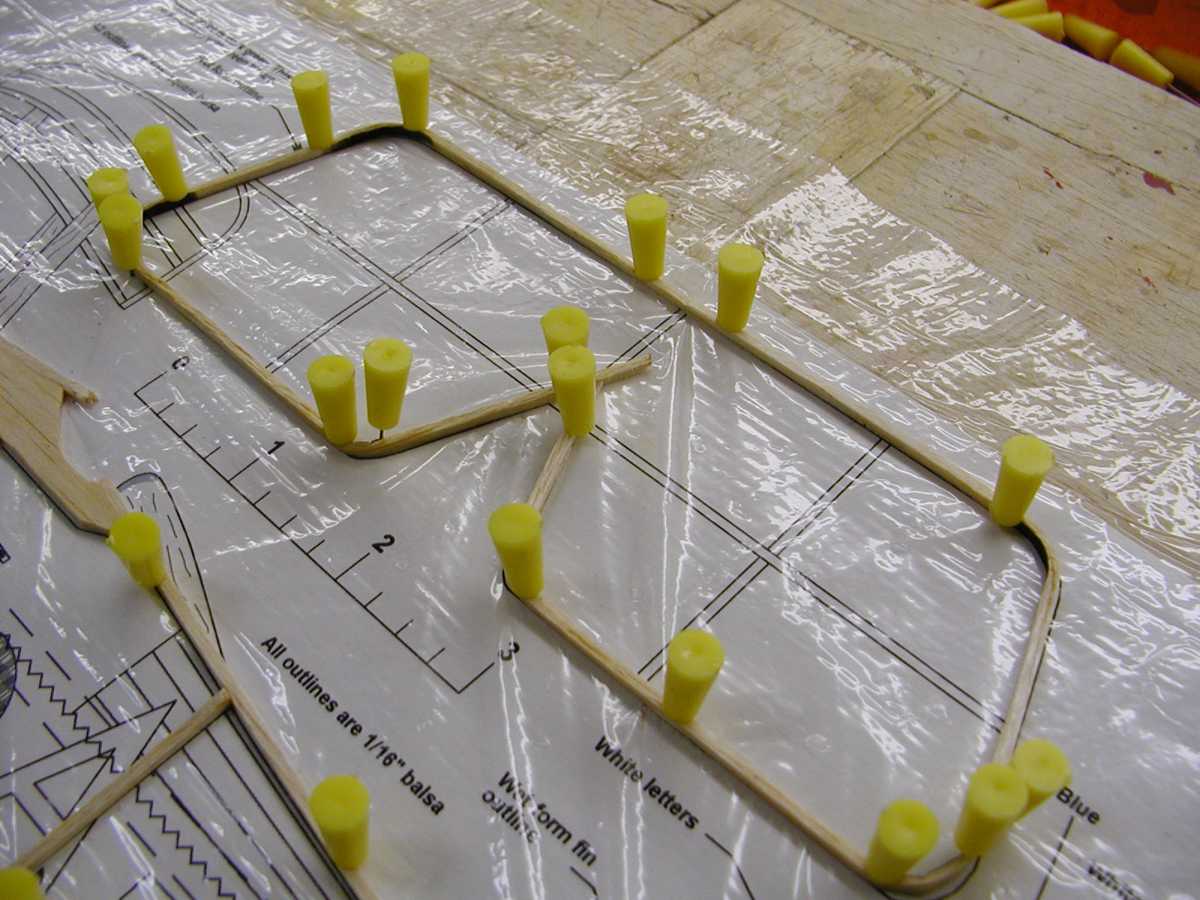
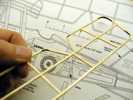
Once the rough shape of the component outline is
completed, you can form it to the final exact shape. The steam from the
forming process will keep the wood fairly pliable for some time. To get
the final shape of the component, simply pin the roughly shaped wood
strip to the plan. You will be able to make necessary adjustments to the
bends without using the soldering iron. |
 |
 |
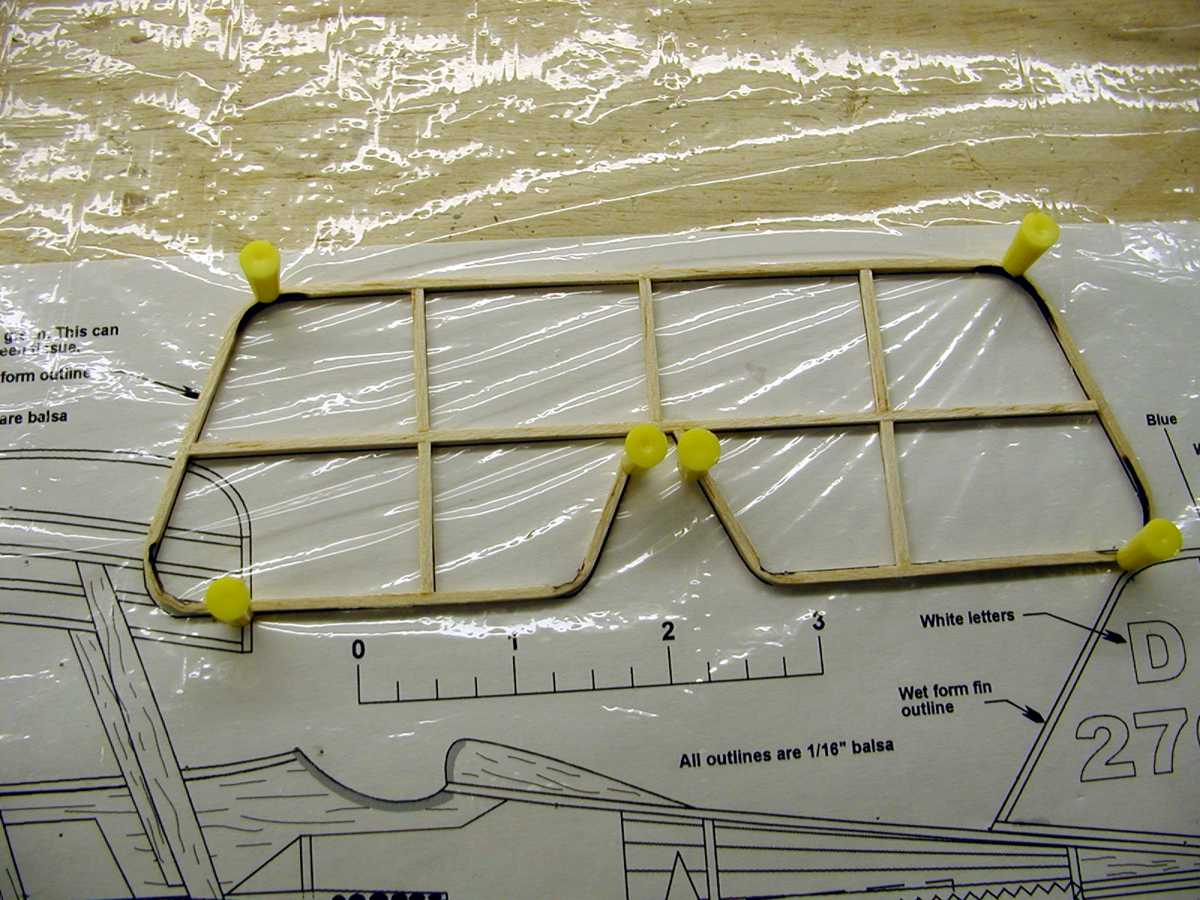
| Let the formed wood strip stay on the plan until the wood
dries completely. Thirty minutes or so should be enough drying time.
Once dry you can final trim the outline and add the internal structural
pieces. Again, if you don't like the appearance of the scorched areas,
they can be sanded clean when the wood is dry. Most of the time the
scorched areas are hidden by the model's covering. |
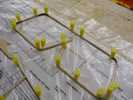
Here is the finished stabilizer. I usually don't bother
with removing the scorched areas. Total time to build this component was
10 minutes. I added the internal structure while the outline was drying
on the board. As you can see, the process, once mastered, is very quick
and easy. |
In summary, it is possible to develop some very light weight flying surfaces
for FAC No-Cal models using wet formed balsa strips for the component outlines.
The process I have described makes forming the outlines easy and does not
require a lot of time or fuss. If you have questions or thoughts on the process please feel free to
contact me at bradleyp@ix.netcom.com
Home